Omni Loader Docs
  • OVERVIEW
    • About
    • Getting Started
    • Databases
    • Performance considerations
    • Prerequisites
  • Project Wizard
    • General
    • Database List
    • Favorites
    • Review
  • Project types
    • Full Table Copy
    • Data Compare & Sync
    • Change Data Capture
    • Overview
  • Project Options
    • General
    • Performance
    • Databases
    • Mapping
    • Logging
    • Troubleshooting
  • Table Options
    • Columns
    • WHERE clause
    • Partitioning
    • Cut-off
    • Options Override
  • Global Settings
    • Overview
  • Automations
    • Overview
    • JSON job specification
  • Connections
    • Amazon RedShift
    • Analytics Platform System
    • Synapse Dedicated Pool
    • CockroachDB
    • CSV
    • Databricks
    • DB2 iSeries
    • DB2 LUW
    • DB2 zOS
    • Greenplum
    • Google AlloyDB
    • Google BigQuery
    • MariaDB
    • MySQL
    • Netezza
    • NuoDB
    • ODBC
    • Oracle
    • Parquet
    • PostgreSQL
    • Snowflake
    • Sybase ASE
    • Sybase IQ
    • SQL Server
    • Teradata
    • Vertica ODBC
    • Fabric Lakehouse
    • Fabric Warehouse
    • Azure SQL Database
    • V-ORDER Fabric Lakehouse Optimization
Powered by GitBook
On this page
  • Complete steps to enable V-ORDER optimization
  • Setup Entra ID
  1. Connections

V-ORDER Fabric Lakehouse Optimization

PreviousAzure SQL Database

Last updated 10 months ago

Elevate analytics efficiency with V-Order, a write-time optimization for Parquet files in Microsoft Fabric, ensuring lightning-fast reads and up to 50% faster performance across Power BI, SQL, Spark, and more.

Complete steps to enable V-ORDER optimization

Setup Entra ID

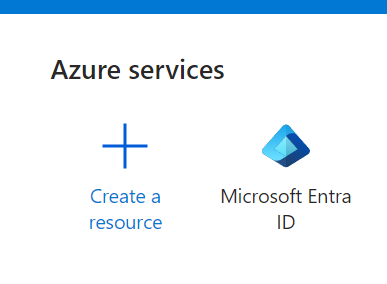
  1. Click on the Microsoft Entra ID in the Azure Portal, or find it in the Search box

  2. Add an App registration

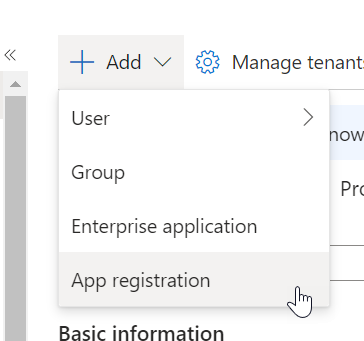
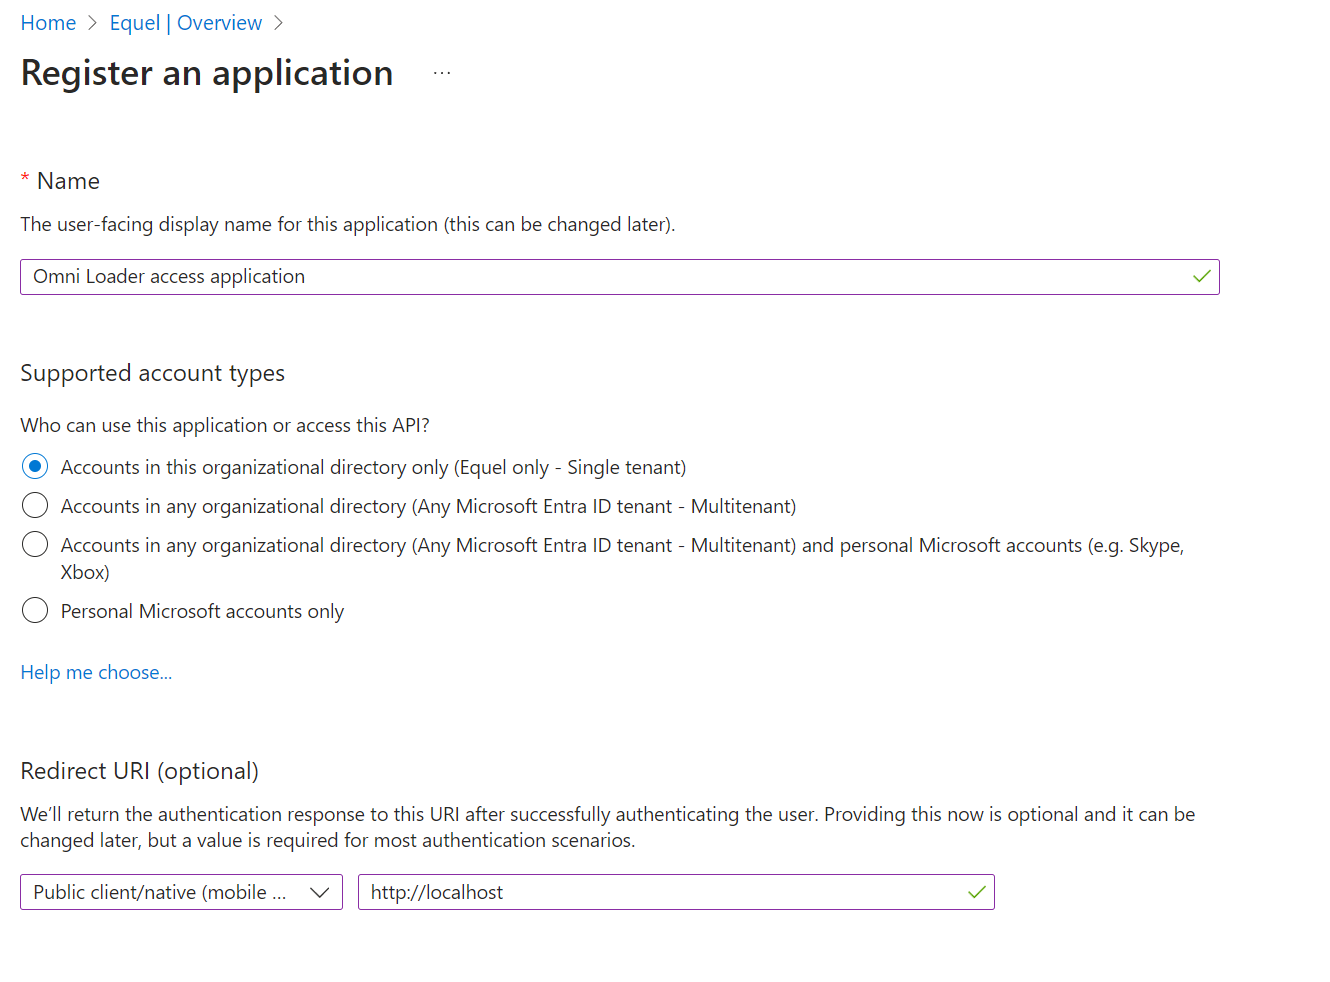
  3. Register an application

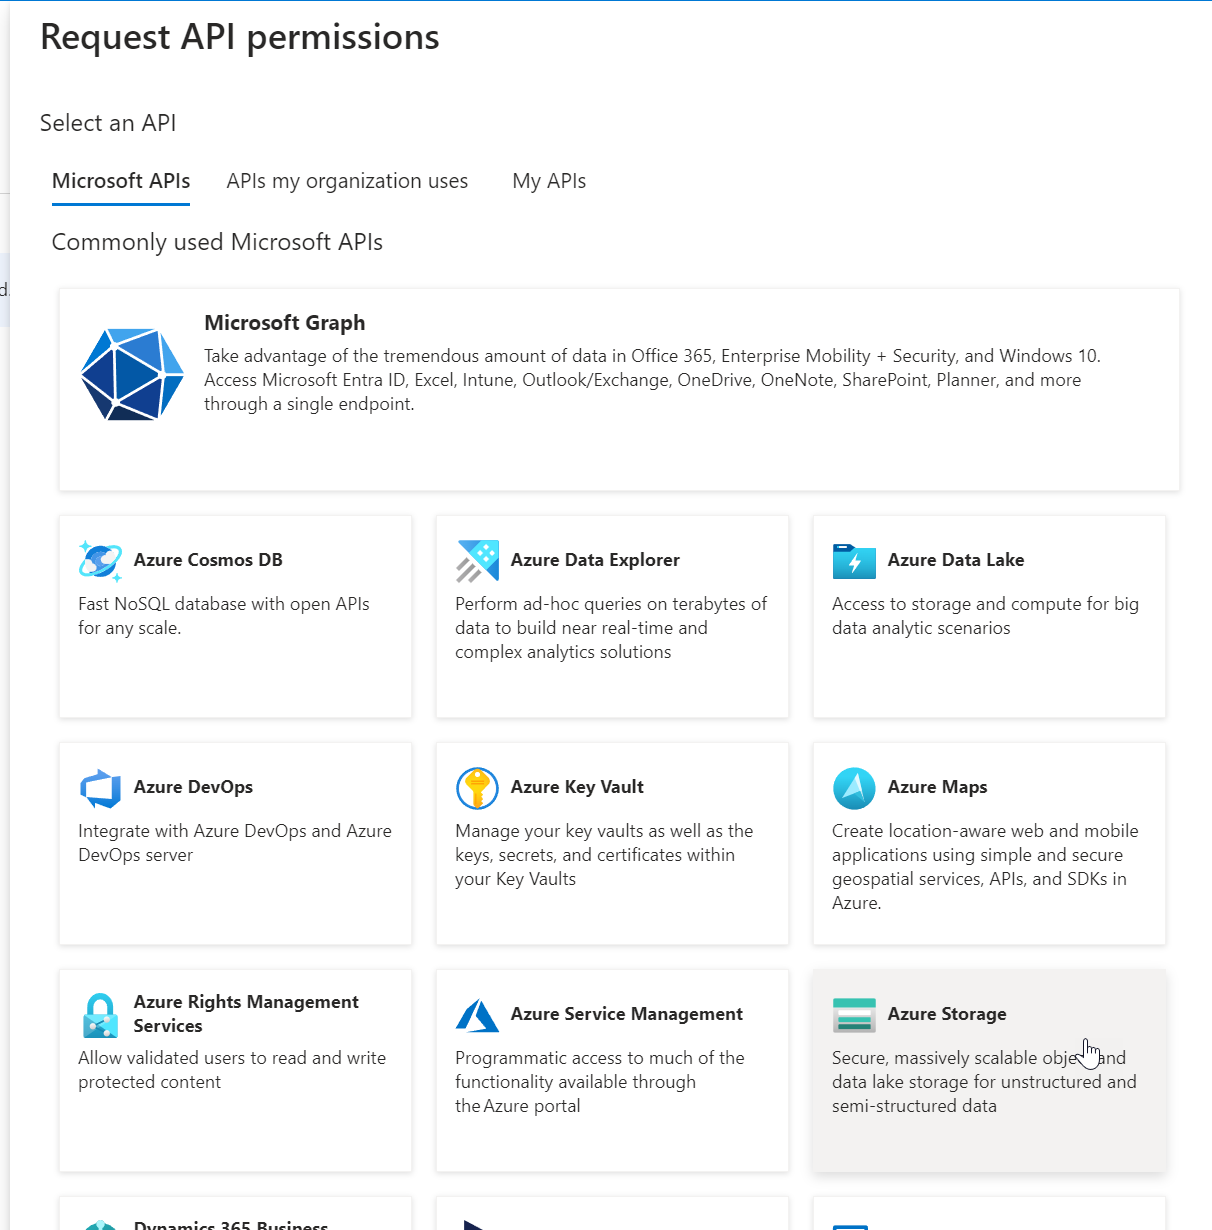
  4. Grant the required API permission by navigation to API permission on the left, then clicking the button "Add a permission":

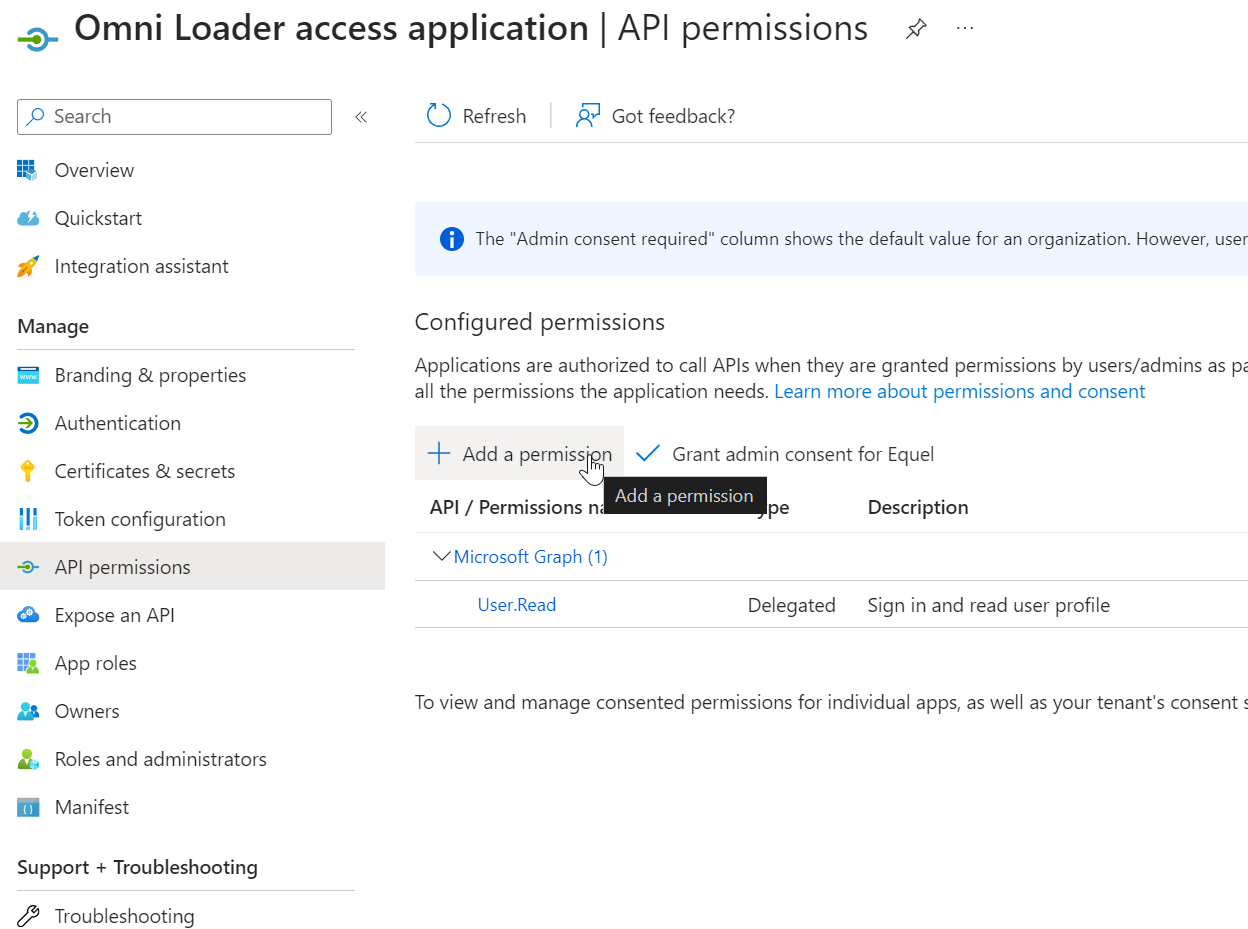
  5. You will need to select Azure Storage, Azure Data Lake, Power BI Service, then add permissions for each.

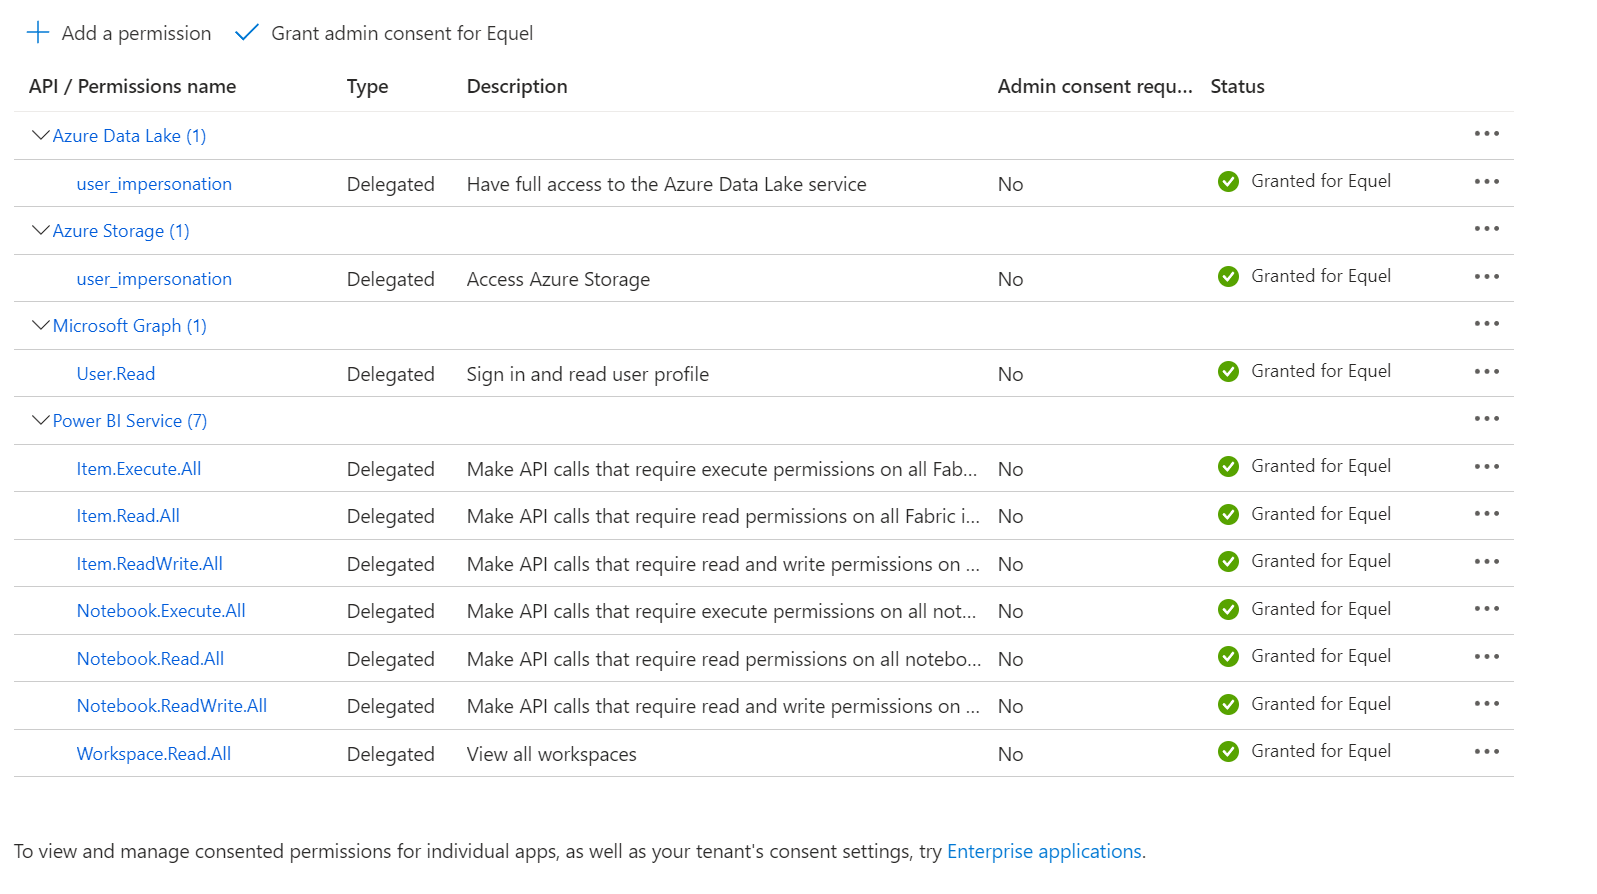
  6. You need to end up with the following permissions. Make sure to grant admin consent for your tenant to avoid Omni Loader users being additionally asked to grant permissions.

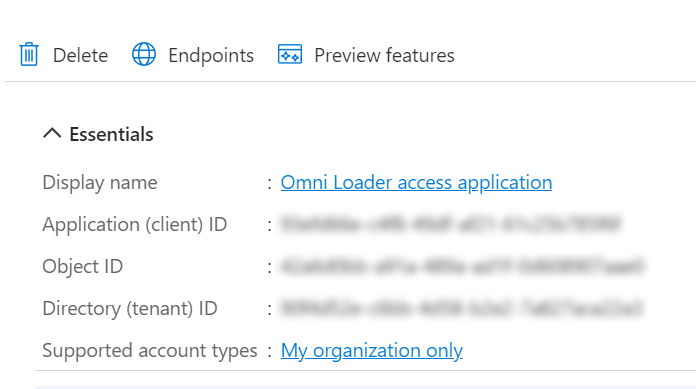
  7. Find your Application (client) ID and Directory (tenant) ID in the Overview screen:

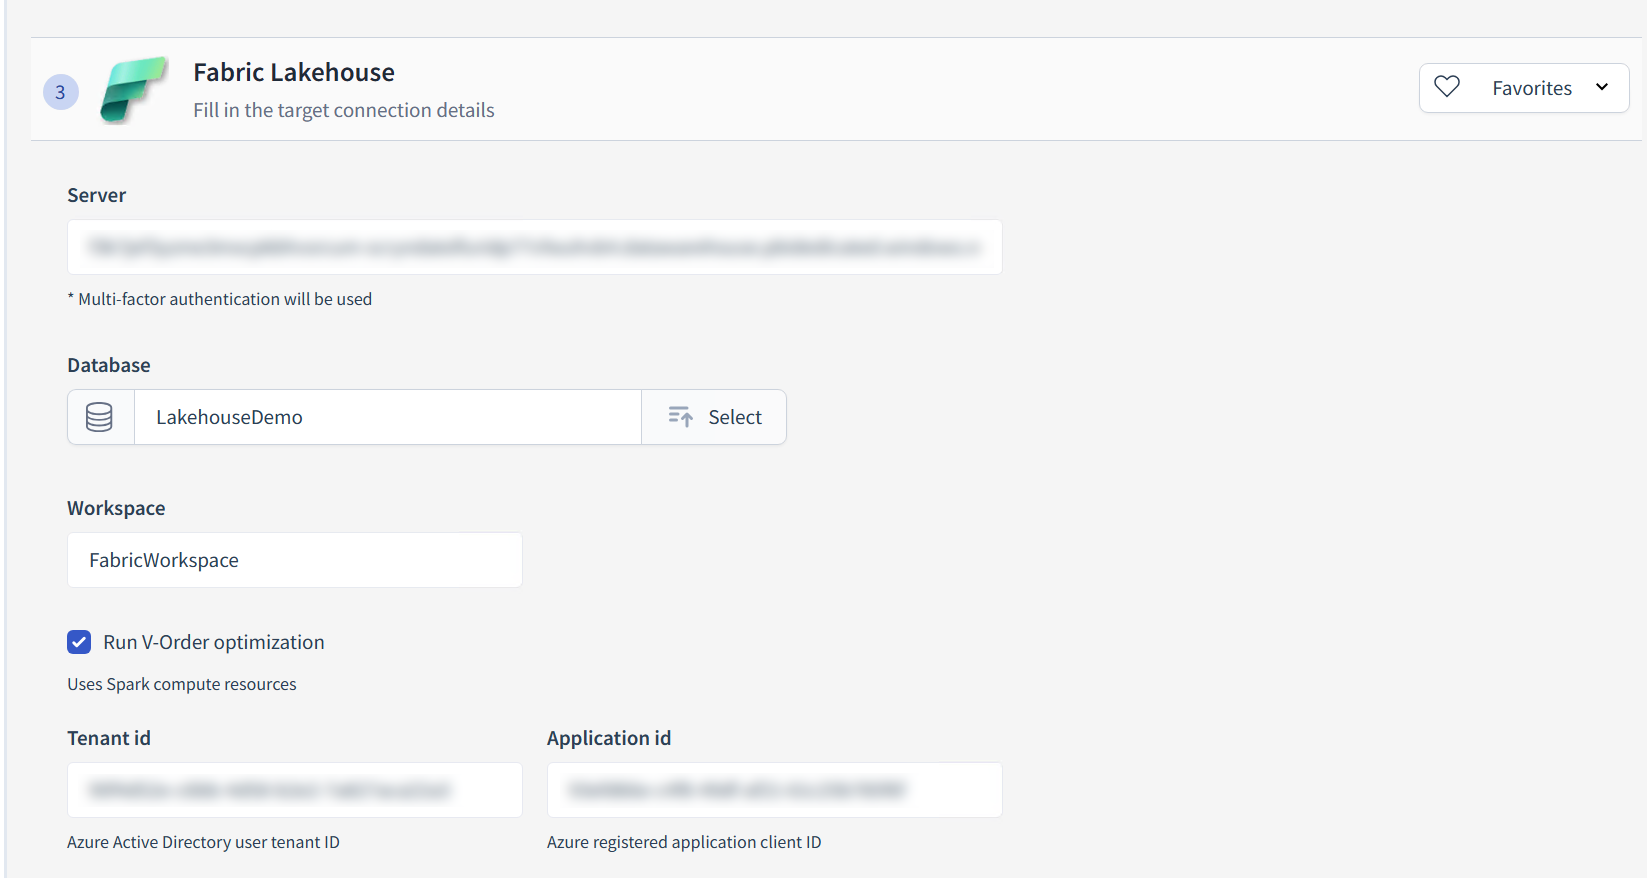
  8. Copy the GUID values into Omni Loader:

  • Important note: it can take half an hour or more for the permissions to be fully active in Azure. If you are getting errors related to notebooks, we advise to simply try again later.